What to Do If You’ve Been Phished: A Step-by-Step Guide
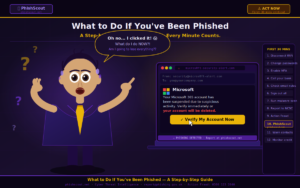
You clicked a link. You entered your details. A few seconds later, something felt wrong.
Or maybe you didn’t notice anything at first until an alert arrived from your bank, or a colleague asked why you’d sent them a strange email, or you tried to log into an account and your password no longer worked.
However you discovered it, the next few minutes matter enormously. Phishing attacks are designed to move fast. The sooner you act, the more damage you can prevent.
This guide tells you exactly what to do, step by step, in the right order.
First: Don’t Panic, But Don’t Wait
Phishing attacks are extremely common; the NCSC reports that millions of phishing emails are sent to UK residents every single day. Being phished does not mean you are careless or foolish. These attacks are professionally designed to deceive people, and they succeed against security professionals, executives, and technically sophisticated users regularly.
What matters now is not what happened, it’s what you do next.
The first 24 hours are critical. The faster you act, the more you can limit the damage.
Step 1: Disconnect From the Internet (If Malware Is Suspected)
If you clicked a link that downloaded a file, ran an attachment, or opened something that installed software on your device; disconnect from the internet immediately.
Turn off your Wi-Fi. Unplug your ethernet cable. If you’re on a mobile device, turn on Airplane Mode.
This prevents any malware that may have been installed from communicating back to the attacker’s server, exfiltrating your data, or spreading to other devices on your network.
If you only entered your details on a webpage and nothing was downloaded, you can skip this step. Credential phishing pages do not typically install malware,they simply capture what you type.
How to tell if something was downloaded: Check your browser’s downloads folder immediately. If you see any file you don’t recognise especially .exe, .zip, .docx, .pdf, or .js files; do not open it. Treat it as malicious until proven otherwise.
Step 2: Change Your Passwords Immediately
This is your most urgent action if you entered your username and password on a phishing page.
Change the password for the account that was phished first. If you entered your Microsoft 365 password, log into Microsoft directly (type microsoft.com in the browser — don’t click any links) and change your password immediately.
Then change every account that uses the same password. Password reuse is one of the most dangerous habits in security. If you use the same password on multiple sites, every one of those accounts is now at risk. Change them all.
Use a password manager. If you don’t already use one, now is the time to start. 1Password, Bitwarden (free), and Dashlane all generate and store unique, complex passwords for every site so you never need to reuse one again.
Make your new passwords strong:
- At least 14 characters
- A mix of letters, numbers, and symbols
- Completely different from any previous password
- Never a word or phrase related to you personally
Change your email password first if your email was compromised — email is the master key that resets everything else.
Step 3: Enable Multi-Factor Authentication
If the phished account doesn’t have multi-factor authentication (MFA) enabled, enable it now.
MFA means that even if an attacker has your password, they cannot log in without also having access to your phone or hardware key. It is the single most effective control against credential-based attacks.
Enable MFA on:
- Your email account (Gmail, Outlook, Yahoo)
- Your Microsoft 365 account
- Your banking and financial apps
- Your Apple ID or Google account
- Any social media accounts
- Your password manager
Go to Settings → Security → Two-Factor Authentication (or similar) on each platform and follow the setup process. Use an authenticator app (Microsoft Authenticator, Google Authenticator, or Authy) rather than SMS wherever possible — SMS-based MFA can be bypassed by SIM-swapping attacks.
One important caveat: If you were targeted by an Adversary-in-the-Middle (AiTM) attack — where the phishing page proxied a real login in real time — the attacker may have already captured your session token and bypassed MFA. In this case, enabling MFA on your account is still essential, but also follow Step 6 to check for active sessions and sign out all other devices.
Step 4: Contact Your Bank Immediately
If you entered any payment card details, bank account numbers, or financial information on a phishing page — call your bank now.
Do not email. Do not use a chat function. Call the number on the back of your card directly.
Tell them:
- You believe you have been a victim of a phishing attack
- You entered your card/account details on a fraudulent website
- The date and approximate time it happened
- The URL of the phishing page if you have it
Your bank can:
- Cancel your card and issue a new one
- Block any pending fraudulent transactions
- Raise a chargeback request for any transactions that have already been processed
- Flag your account for enhanced monitoring
- In some cases, recover transferred funds if you act quickly enough
If money has already been transferred: Contact your bank’s fraud line and specifically ask them to raise a Faster Payment recall. If the transfer was made via Faster Payments (the standard for UK bank transfers), your bank can contact the receiving bank and request the funds be returned. This process is time-sensitive — the sooner you call, the higher the chance of recovery.
UK bank fraud lines:
- Barclays: 0800 056 3535
- NatWest / RBS: 0800 161 5154
- HSBC: 0800 032 9121
- Lloyds / Halifax / Bank of Scotland: 0800 072 3322
- Santander: 0800 9 123 123
- Nationwide: 0800 030 4719
- Monzo: In-app chat → Freeze card immediately
- Revolut: In-app → Security → Freeze card immediately
Step 5: Secure Your Email Account
Your email account is the most critical account to secure after a phishing attack, because it controls access to everything else.
Log into your email account directly (type the URL — gmail.com, outlook.com — do not click any links) and:
1. Check for unauthorised inbox rules. Go to Settings → Filters/Rules. Look for any rules you didn’t create — particularly rules that forward your emails to an external address, mark emails as read automatically, or move emails to trash. Delete any you don’t recognise. These are a sign an attacker has already been in your account.
2. Check your sent folder. Look for any emails you didn’t send. Attackers often use compromised email accounts to send phishing emails to your contacts immediately after gaining access.
3. Check connected apps and devices. Look for any third-party applications with access to your email that you don’t recognise. Revoke access to anything unfamiliar.
4. Sign out of all other sessions. Gmail: click your profile picture → Manage your Google Account → Security → Your Devices → sign out of all. Outlook: Account settings → Security → Sign out of all sessions.
5. Change your recovery phone number and backup email if they have been changed to numbers or addresses you don’t recognise.
Step 6: Check for Active Sessions and Revoke Access
Beyond email, check your most important accounts for active sessions from devices or locations you don’t recognise.
Microsoft 365 / Outlook: Go to account.microsoft.com → Security → Sign-in activity. Look for any sign-ins from unfamiliar locations or devices. Click “I didn’t do this” on any suspicious entries and follow the steps to secure your account.
Google / Gmail: Go to myaccount.google.com → Security → Your devices. Review all listed devices and remove any you don’t recognise.
Apple ID: Go to appleid.apple.com → scroll down to see all devices signed into your Apple ID. Remove any you don’t recognise.
Social media: Facebook: Settings → Security and Login → Where You’re Logged In Twitter/X: Settings → Security and account access → Apps and sessions Instagram: Settings → Security → Login Activity
Sign out of all active sessions on any account where you suspect compromise.
Step 7: Scan Your Device for Malware
If you clicked a link that downloaded a file, or you’re not certain whether malware was installed, run a full malware scan.
Windows: Windows Defender (built-in) is genuinely effective and free. Open Windows Security → Virus & threat protection → Scan options → Full scan. Let it run completely — this takes 30-60 minutes.
For a second opinion, also run Malwarebytes Free (malwarebytes.com) — it catches many threats Windows Defender misses. Download only from the official site.
Mac: macOS has strong built-in protections but is not immune. Use Malwarebytes for Mac (free version) for a thorough scan.
iPhone / Android: Mobile devices are harder for malware to compromise through phishing pages alone — but check for any apps you don’t recognise and delete them. If you installed any app as a result of the phishing attempt, delete it immediately and restart your device.
If malware is found: Follow the removal instructions provided by your security software. In severe cases — particularly if ransomware is involved — consider a full factory reset of the device after backing up essential files to an external drive (not cloud storage, which may sync malware).
Step 8: Report the Phishing Attack
Reporting phishing attacks is not just bureaucratic box-ticking — it actively helps protect others. Every report contributes to threat intelligence that helps block future attacks.
Report to Action Fraud (UK): actionfraud.police.uk or call 0300 123 2040 Action Fraud is the UK’s national fraud and cybercrime reporting centre. File a report even if you haven’t lost money — attempted fraud is reportable. You will receive a police crime reference number which is useful for insurance claims and bank disputes.
Report the phishing email to the NCSC: Forward the email to report@phishing.gov.uk The NCSC’s Suspicious Email Reporting Service (SERS) has received millions of reports and taken down tens of thousands of malicious websites as a result. Takes 10 seconds.
Report phishing texts: Forward the text to 7726 (spells SPAM on a phone keypad). Free from all UK networks. Feeds into mobile carrier fraud detection systems.
Report to the platform being impersonated: If the phishing email impersonated HMRC, forward it to phishing@hmrc.gov.uk If it impersonated your bank, forward it to your bank’s phishing report address (usually listed on their website) If it impersonated Microsoft, forward it to phish@office365.microsoft.com
Report to PhishScout: Submit the phishing URL and any details at phishscout.net — our team will verify it and add confirmed IOCs to our live threat feed, helping protect the wider community.
Step 9: Notify the Right People
Depending on what was compromised, you may need to notify other people or organisations.
Your employer: If the attack happened on a work device or work email account, notify your IT or security team immediately. Do not be embarrassed — this is exactly what they need to know, and reporting quickly limits the damage to your organisation. Most companies have incident response procedures that are triggered by reports like this. The sooner they know, the sooner they can check whether other accounts were affected.
Your contacts: If your email or social media was compromised and used to send phishing messages to your contacts, warn them as soon as possible. Send a message from a secure account (not the compromised one) telling them to ignore any recent unexpected messages from you and not to click any links.
The ICO (if personal data was affected): If you are a business owner and the phishing attack resulted in a breach of customer or employee personal data, you may have a legal obligation to report to the Information Commissioner’s Office within 72 hours under UK GDPR. Report at ico.org.uk/make-a-complaint/data-security-concerns
Credit reference agencies: If your National Insurance number, passport details, or other identity documents were compromised, contact Experian, Equifax, and TransUnion to place a protective alert on your credit file. This makes it harder for fraudsters to open accounts in your name.
- Experian: experian.co.uk
- Equifax: equifax.co.uk
- TransUnion: transunion.co.uk
Step 10: Monitor and Stay Alert
The immediate danger passes once you’ve completed the steps above — but your vigilance should remain elevated for the weeks following a phishing attack.
Monitor your bank statements daily for the first month. Look for any transactions you don’t recognise, however small. Fraudsters sometimes make small test transactions before larger ones.
Watch for follow-on phishing. Once an attacker has your email address, phone number, and name (which they now do), expect highly personalised follow-up attempts. These may impersonate your bank, HMRC, or even claim to be from the police investigating the fraud you just reported. Be especially sceptical of any unsolicited contact in the weeks following an attack.
Check your credit file monthly for 6 months. New credit applications you didn’t make, new accounts you don’t recognise, or address changes you didn’t request are all signs of identity fraud using your compromised details. All three UK credit agencies offer free basic monitoring.
Review your security posture. Once the immediate response is complete, use the experience as a prompt to audit your overall security:
- Are all your accounts using unique passwords?
- Is MFA enabled on every important account?
- Are you using a password manager?
- Do you know what to do if this happens again?
What If It Was a Work Device?
If the phishing attack happened on a company device or corporate email account, the steps above still apply — but the order of priority changes.
Notify your IT or security team first — before changing any passwords or running scans. Your organisation’s incident response team needs to be involved immediately, and they may have specific procedures that must be followed. Changing passwords or running scans before notifying IT can sometimes destroy forensic evidence that the security team needs.
If you are the IT team, or if you are a sole trader whose work and personal accounts overlap, work through the steps above in order and document everything you do and when you did it — this record will be essential for any insurance claim or regulatory notification.
Quick Reference — First 30 Minutes
If you’ve just been phished and need to act immediately, do these things in order:
✅ 1. If a file was downloaded — disconnect from internet NOW
✅ 2. Change the password on the phished account
✅ 3. Change passwords on all accounts using the same password
✅ 4. Enable MFA on the phished account
✅ 5. Call your bank if financial details were entered
✅ 6. Check your email for forwarding rules you didn't create
✅ 7. Sign out of all active sessions
✅ 8. Forward the phishing email to report@phishing.gov.uk
✅ 9. Report to Action Fraud at actionfraud.police.uk
✅ 10. Run a malware scan
✅ 11. Warn your contacts if your account sent phishing messages
✅ 12. Report the phish to PhishScout at phishscout.net
Conclusion
Being phished is frightening — but it is recoverable. The attacks that cause the most lasting damage are the ones where the victim doesn’t know what to do, waits too long to act, or is too embarrassed to report what happened.
Now you know exactly what to do. The checklist above gives you a clear, actionable path through the first 30 minutes and beyond. Follow it, report it, and don’t let it happen again.
If you want to test how phishing-resistant your organisation is before an attacker does, PhishScout offers phishing simulation and awareness training for UK small businesses — built on the same threat intelligence that powers our live feeds.
Report phishing to PhishScout at phishscout.net · Forward suspicious emails to report@phishing.gov.uk · Call Action Fraud on 0300 123 2040